
Silhouettes
Tutorial created by Jacqueline Kublik, with help from Kiarra Burd, Jocelyn Diemer, Kavita Premkumar, Lucie von Schilling, Rebekah Stretch, and Denae Dyck
Online tutorial created by Priscilla Adebanji

Silhouette portrait of woman, n.d. © The Bill Douglas Cinema Museum
The silhouettes we have come to recognize today originated some 400 years ago in France. They subsequently spread throughout Europe and into England. Among the earliest silhouettes from England are those depicting King William III and Queen Mary in 1699. Silhouettes were not reserved for or accessible to nobility alone; in fact, making silhouettes became an affordable and common practice among amateurs and professionals alike in the Victorian era. Typically done freehand or with the use of candles and shadows, silhouettes enjoyed a strong popularity until around 1850. Much more recently, the silhouette has been recovered as a contemporary trend, adapted by artists including but not limited to Cheryl Rock (Instagram @blaquerock), Alison Russell (Instagram @alisonlouiserussell), and Karl Johnson (Instagram @cutarts).
This tutorial will walk you through how to make your own silhouette using a light source and shadow. Feel free to experiment with different colors, sizes, and subjects! See the bottom of the page for information about alternative crafting methods and further resources.
Want to learn more about this craft? Click here for a list of scholarly readings, blogs and websites, instructional videos, extant examples, and 19th-century tutorials.
To read some makers’ reflections on this craft, and to see what they made, click here.
Fun fact!
There are two origin stories behind the term “silhouette.” First is the tale that Etienne de Silhouette, the finance minister of King Louis VI, was so stingy that his name became used for these inexpensive shadow portraits. Second is the idea that the great silhouettist Auguste Edouart came up with this name to distinguish his own work from portraits made by machines.
You will need

A graphite pencil, a white pencil, an exacto knife, scissors, glue, sticky tack, one extra large sheet of tracing paper, one large sheet of white paper, one large sheet of black paper, and a small flashlight
Pencils (graphite pencil and white pencil)
Scissors
Glue
Portable light source (a flashlight that works well)
Sticky tack (or tape)
Chair
Paper (tracing, white, and black sheets of paper)
Optional Items:
Exacto knife
Frame
TIP: The paper size will differ depending on how large you’d like your silhouette. For a life-size silhouette, poster board-sized paper (22" x 28") works well. If you can’t find large enough tracing paper, you could use an extra piece of white paper instead. However, tracing paper is lighter, which is helpful when hanging it on the wall.
For Instructors: Visit our Crafting in the Classroom page for information on embodied learning, or click here for further resources about this craft.
Preparing your workspace
Using sticky tack or tape, attach the paper (either tracing or white) that you will use to trace your silhouette onto a wall.
Align your chair and light source several feet away so that the silhouette image fits the size of your paper.

Workspace showing paper mounted on the wall, chair poised in front of the paper, and light source (flashlight) a few feet away, resting on a small table
Getting started
Turn off the room lights and turn on the flashlight.
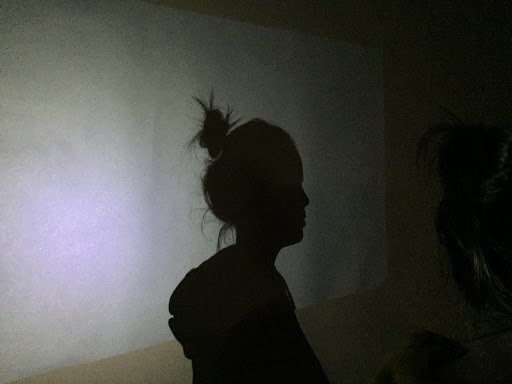
Subject (a young woman) seated in the dark, in front of the paper, illuminated by the flashlight
Preparing your silhouette
Cut out your silhouette using your scissors and exacto knife (if needed).
TIP: Cut a rough outline of your silhouette before cutting out the finer details.

Outline of the subject depicted in previous image, traced in pencil on paper

Cutout of the subject depicted in the previous image
Place the white cutout facing the opposite side you would like the final silhouette to face on the piece of black paper. For instance, if you would like your subject’s profile to face right for the final piece, place it facing left on the black paper. Doing so will ensure that any pencil outline made in the next step will not appear on your final product.
TIP: Place the cutout as far to the side of the black piece of paper as possible, to allow yourself extra paper to use in case of a mistake.
Cutout of the subject, facing left, on the far right side of a piece of black paper

White pencil outline on black paper, depicting the subject in the previous image
Using your white pencil, trace the cutout of your silhouette.
Cut out using your scissors and exacto knife (if needed).
TIP: Again, cut a rough outline of your silhouette before cutting out the finer details.
Glue your black cutout to your final white piece of paper.

Black paper cutout of the subject
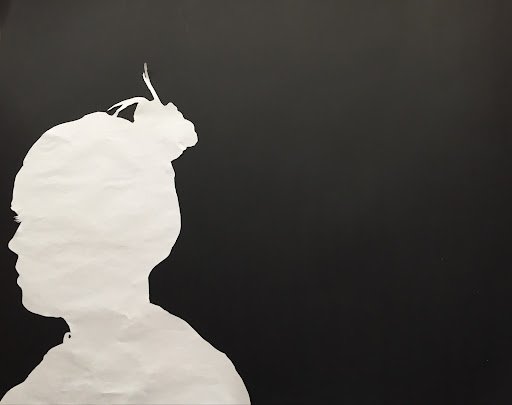
Jacqueline’s Silhouette

Silhouette by Jacqueline Kublik
Please send us your own work-in-progress and/or finished creations! Email us at craftyvictorians@gmail.com, tweet us @craftyvictorian, or connect with us on Instagram @crafty_victorians.