
Pressing the Pulp: How to Make Paper


Need some medieval-ish tunes to fuel your crafting vibe?
Look no further, curious crafter! Here is a playlist curated — by yours truly — for this tutorial!
Your papermaking process (excluding drying time) shouldn’t take longer than this playlist’s runtime! With bumpin’ bardcore renditions of artists like Taylor Swift to Phil Collins, there’s something for everyone! Click on the album art or click on the button below to tune in!
For this craft, you will need:
A Mould and Deckle - A “M+D” is the frame and screen device that you’ll be forming the paper with! You can create your own with this easy tutorial from Paperslurry OR you can purchase one online! Here is the purchase link that I used!
Scrap Paper - I used an array of schoolwork from the previous year & a class presentation script to shred up!
Sponges - These will help soak up any excess water, allowing your paper to release from the M+D a little easier!
Tea Towels - I’d recommend using smooth-textured fabric towels for this project to prevent any texture transfer!
A Shallow Container - You’ll have to fill this container with a few inches of water and will need to be able to fit your M+D into it with some (literal) wiggle room. I have seen many folks use watertight plastic tubs or drawers. I used a metal tray!
Cooking Trays - These were helpful when I was laying my delicate, wet sheets out to dry as they provided a stable base!
Blender or Food Processor - You’ll have to blend your softened paper. The mix’s thickness wasn’t a problem for me but, if this step makes you anxious because of your expensive machine, you can frequently find blenders at the thrift store!
Water - You’ll need a few cups of water (I used a mix of water and coffee to try and give my paper an antique sepia tone!)
A Sunny Spot to Dry your Sheets - The drying time may vary but make sure that you have a shelf or space where your drying (and very fragile) sheets can rest for a while (and remain undisturbed from any little curious hands or paws!)
Optional Supplies:
A Thin Paintbrush - I used this paintbrush as a tool to correct any sections of paper where my paper was a little uneven!
Decorative Wire - I used coated wire in an attempt to echo the aesthetic appearance of traditional medieval watermarks! Scroll through some assorted historical examples with this article from the University of Notre Dame’s Medieval Institute!
Various Leaves, Dried Flowers, Seeds, Etc. - I used leaves to experiment with nature-based watermarks! In the future, I’d like to experiment with incorporating dried flowers into my finalized homemade papers. Other crafters have used seeds in this papermaking process to create plant-able papers that act as vessels for writing and as vehicles for new plant life! To see an update regarding this nature-printing experiment, scroll down in this tutorial to see how it turned out!
Paint, Pens, and Pencils - You can use to these to adorn your finished papers! Scroll to the end to see my final creations!

PULP IT!
Step 1: Shredding your Scrap Paper
Tear your scrap paper into small pieces. We will end up blending these so, do not worry about making the pieces incredibly small at this stage. Other tutorials advise crafter to soak their shreds for a few hours or — in some cases — overnight.

Step 2: Soaking your Shredded Paper Pieces

Since I used hot brewed coffee instead of water, I found that the paper softened up completely in only a few minutes.
The process reminded me of my middle school Egyptology unit, staining faux papyrus with speckles of instant coffee!
I would encourage any curious crafters who are interested to experiment (carefully) with soaking your shreds in boiling water, tea, or coffee to alter the colour of your final paper AND speed up the total papermaking process!
Step 3: Blending your Soaked Shreds into a Slurry

As mentioned in our supplies list, feel free to purchase a second-hand blender or food processor from the thrift store if you’re feeling nervous about how your own machine may handle this next task. Personally, my Magic Bullet blender worked wonderfully, creating a smooth slurry after about a minute of blending time.
If your pulp begins to separate between two layers, one rougher and one smoother, just shake the blending cup around for a moment and then proceed to pulsing!
Step 4: Transfer your Slurry
Transfer your slurry (your blended mix of paper and water) into a bowl. My dad dubbed this “the oatmeal stage”. Admittedly, your slurry might also look like oatmeal if you use coffee or — if you use water — your slurry might look like water-logged snow or a cream-coloured slushie. 7/11 run, anyone? Please enjoy this photo of my distinctively oatmeal-like slurry below!

PRESS IT!
Step 1: Filling your Basin
Grab your shallow container/tray and fill it with water until it is about 2-3 inches deep. Then, add in about two handfuls of your slurry mixture (approximately 1-2 cups) and stir with your hands or with a spoon. This addition will make your basin’s content become cloudy. It is certainly not an aesthetically pleasing part of the process (especially if you’re using brown tones like me!). You are now ready to begin the mould + deckle-ing process (AKA… actually making the sheet of paper!)
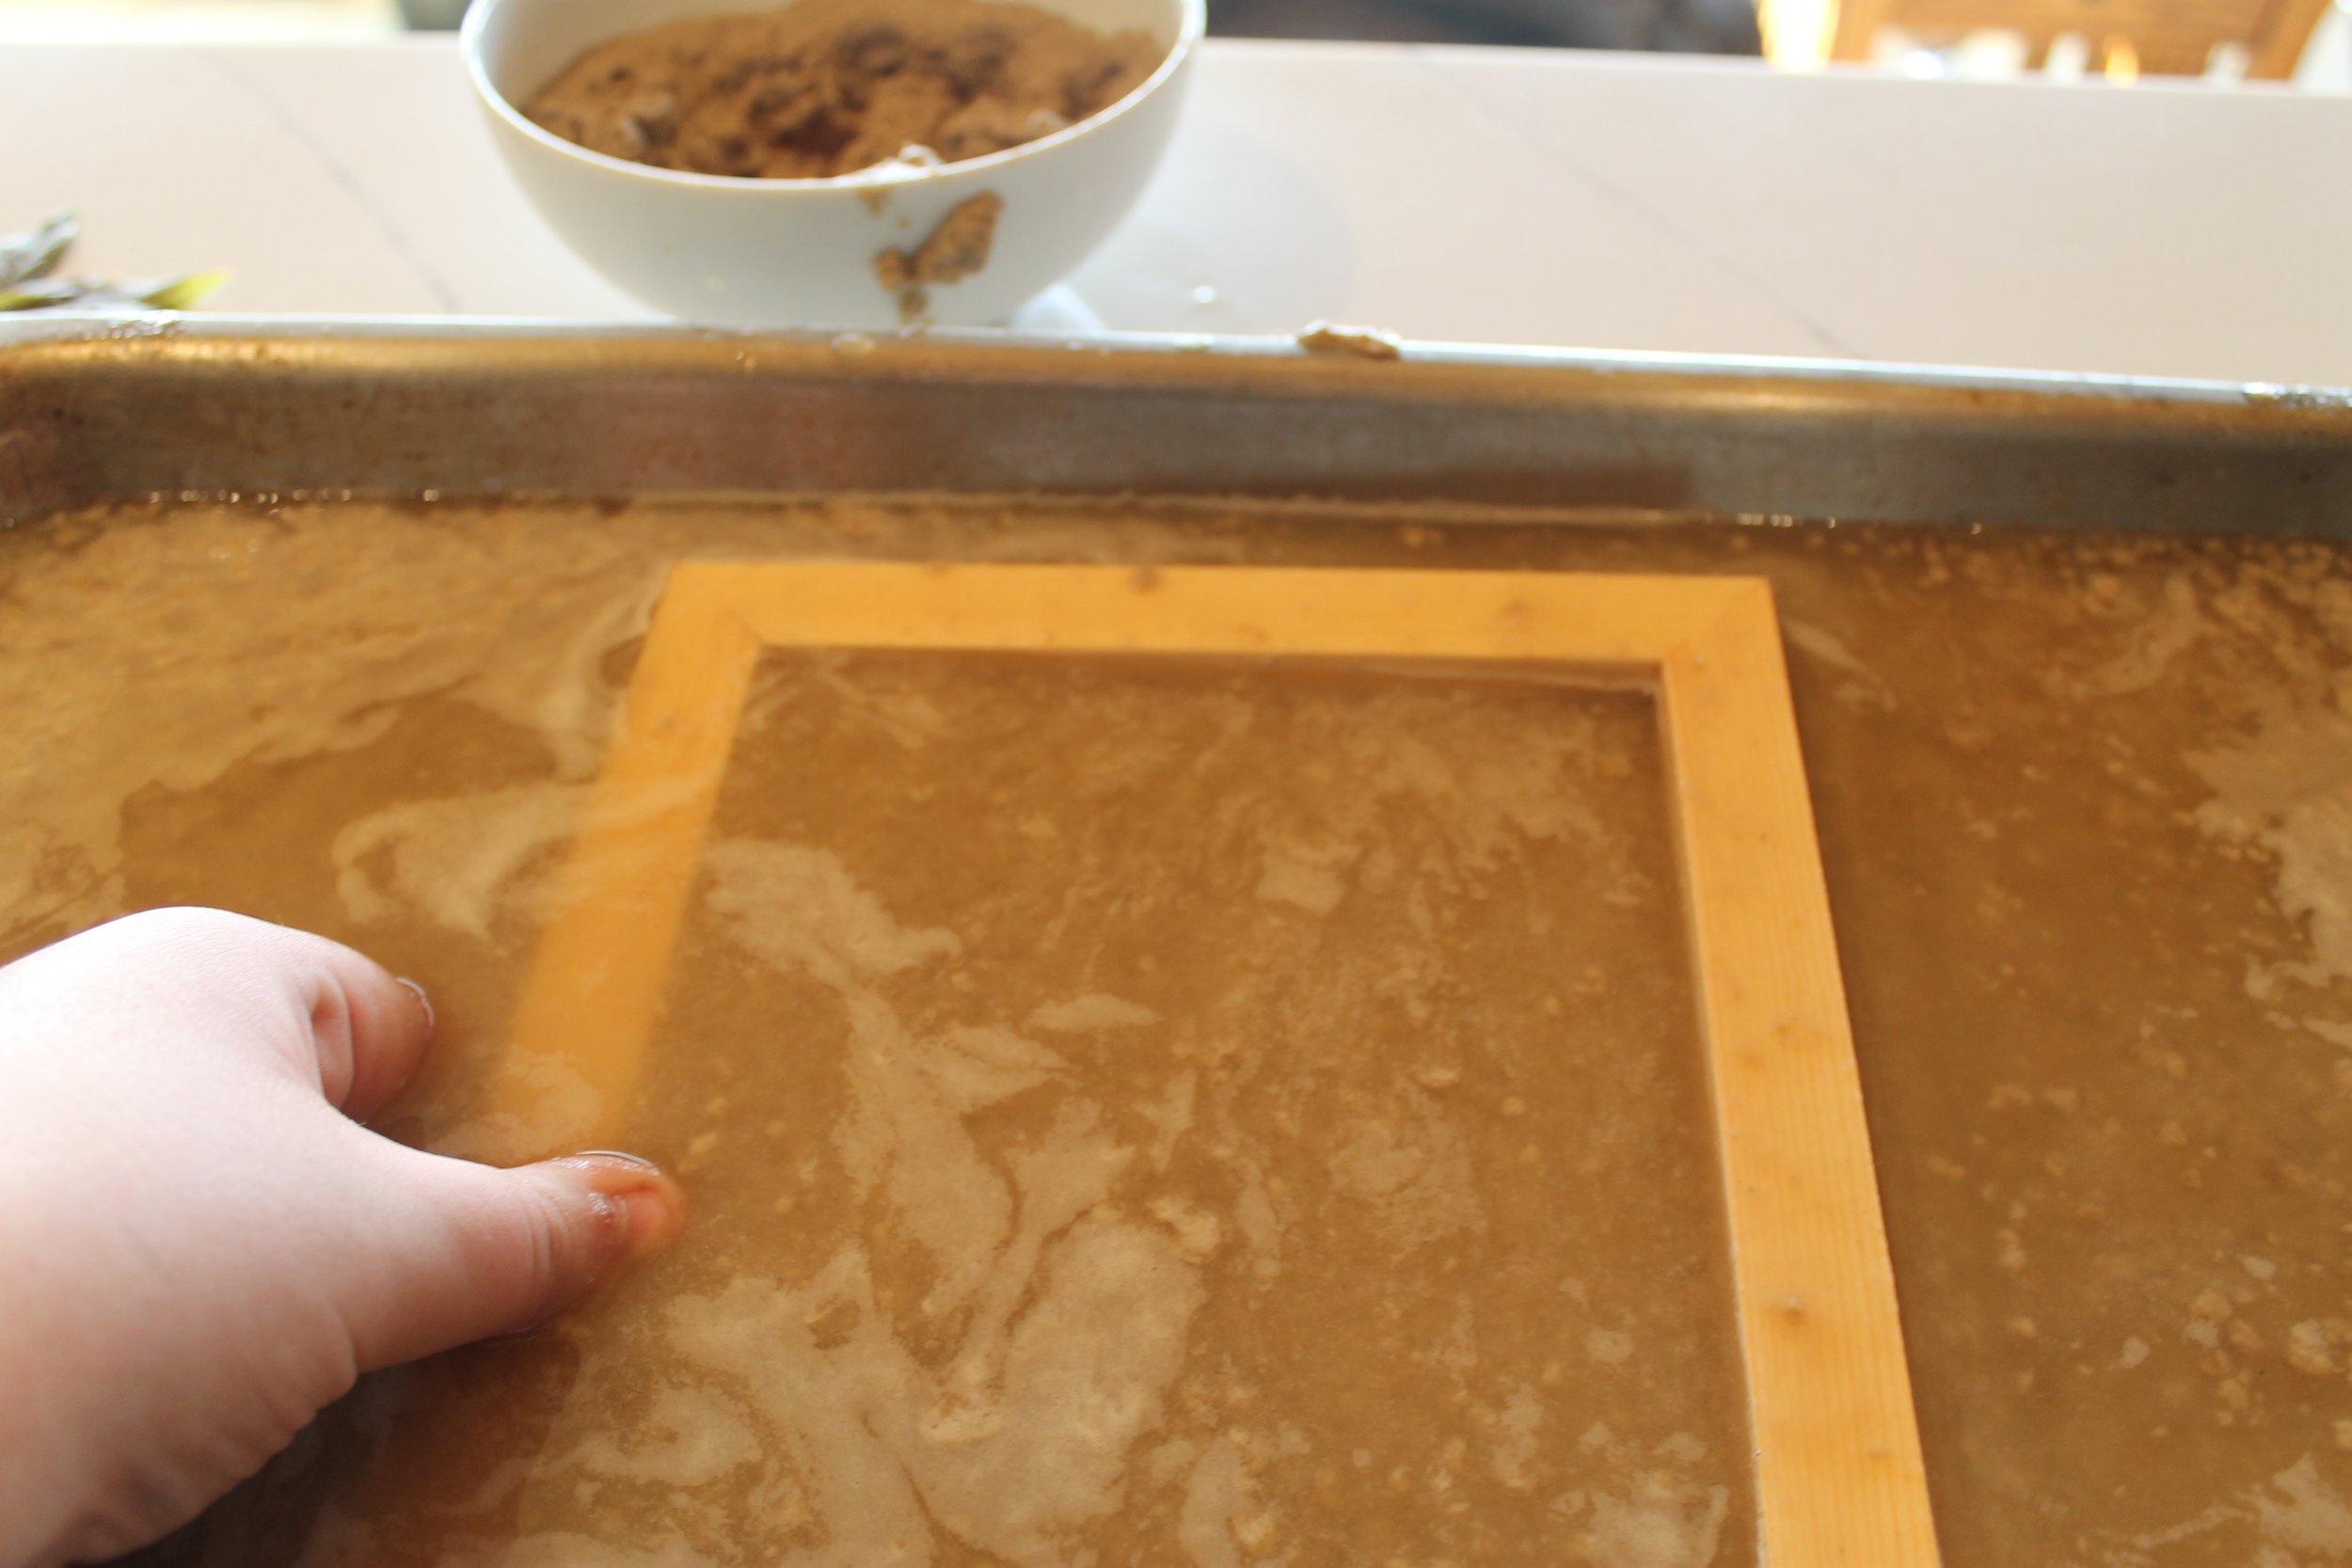
Step 2: Making your Paper Sheets
Once your slurry is mixed into your few inches of water, you are now ready to create your first sheet! Submerge your M+D, making sure to gather an even layer of paper particles on top of the screen. Gently lift the M+D upwards in a slow motion, ensuring that you do not jostle the frame and — in doing so — create an uneven sheet of paper. Hold the M+D above the container for a few moments to allow any excess water to drip off naturally. Do not worry if the paper seems slightly uneven.
Note: if you’d like to experiment with making seed-paper, you’d want to sprinkle the seeds onto the sheet at this stage.
Sometimes, the paper particles clump together while floating in the water. I think that, in the future, I will try to blend my slurry for a bit longer to — hopefully — prevent this from happening again! However, here is a “mix-up method” video clip to help you navigate this dilemma if it happens while you’re making your paper! Click the video below to watch and follow along!
I had a little bit of trouble keeping the layer of paper particles even. While this isn’t too much of an issue when it comes to your finished paper, I figured out a “pulse method” that helps with the redistribution! Watch the video clip below to see this top tip!
Step 3: “Couching” and Sponging your Sheets
“Couching” (pronounced as coo-ching) is the step in papermaking where you transfer your gathered sheet onto a piece of fabric to allow it to dry. Flip the M+D confidently and quickly to ensure that your particles have as little time to slip as possible! Make sure that the screen-side of your M&D is facing upwards with the “sheet” laying on the fabric of your tea towel. Some tutorials use paper towels for this transfer, but I would advise against that as they may disintegrate/pill from the moisture.

Use your sponges to gently press the excess moisture from your screen-covered sheet. The more moisture that you remove in this step, the easier that your M+D will release the sheet when you list it and the faster the dry time will be.
Take special care to sponge the corners to dry them out as much as possible. If you do not, you might end up with a few missing pieces of your final sheet when you pull up the M+D’s screen — this was a lesson I learned rather quickly!

Step 4: The Seeking-“Rising-Sun”-Stage
It’s time to allow the sunshine to work its magic! I recommend placing your damp sheets near a windowsill. This way, they will be able to dry a bit quicker. This is also the time in the process where — if desired — you may press wire-formed watermarks or natural objects like leaves or dried flowers into the paper. I tried out a few different artistic techniques, pictured below:
Step 5: Wait & Watch!
Now, the hardest part of any task… being patient! Your sheets may take up to a few days to dry depending on the thickness of the paper, the humidity in your home, the amount of sunlight streaming in, etc!
You can check on your paper’s progress by gently touching the surface of your sheets, feeling for when the surface is totally dry to the touch. Then — once it is dry — come back to this tutorial for the final stages!

Step 6: “Harvesting” your Dried Sheets!
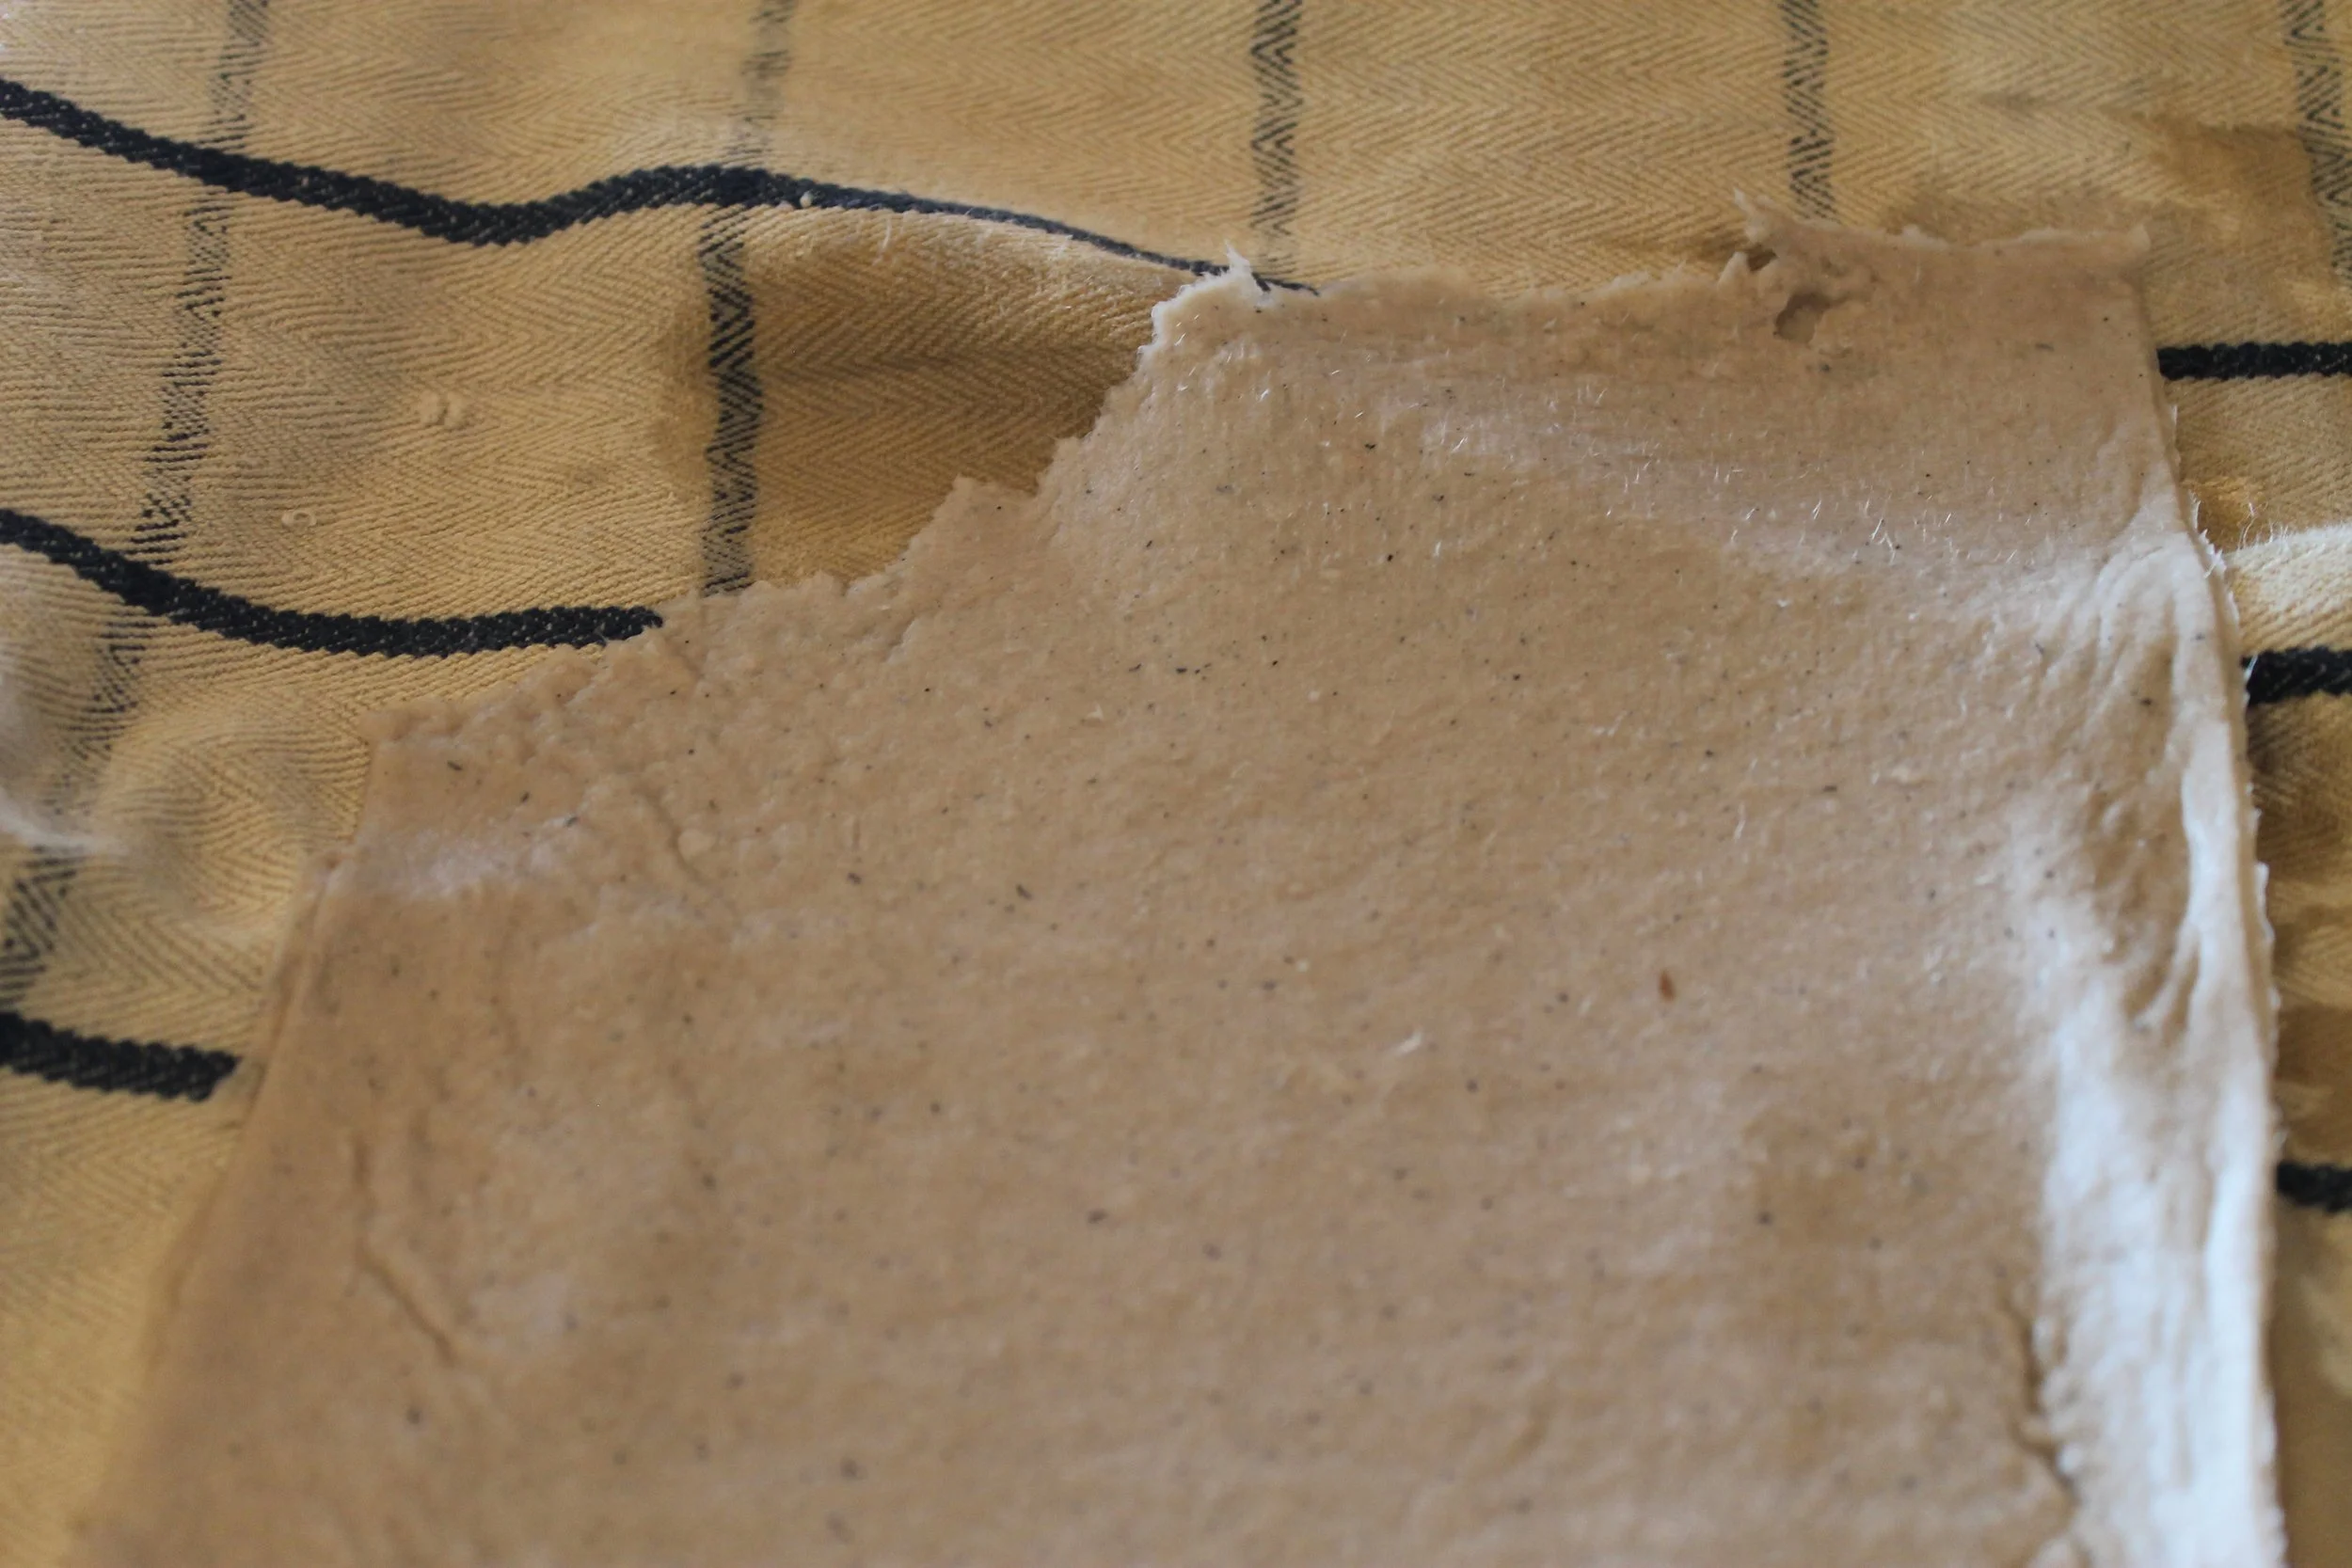
Once your sheets feel completely dry to the touch, try to gently peel a corner of the sheet off of your fabric towel.
If the sheet peels upwards with little-to-no resistance, you’re all set to “harvest” them! Peel the sheets off of your towel at a slow pace. If they are properly dried, they should not tear at this stage. However, remember that your paper is still very fragile!

An Update on my Nature-Printing Experiment:
As I said in the supplies list section, I tried out a method of nature-printing that I hadn’t seen many people take part in across the various papermaking sources that I surveyed. Overall, I was shocked with how this sheet turned out! The exposed sections of the paper deeply browned in the sun while the leaf-hidden sections came out as extremely bright white.


Because my paper slurry wasn’t very white to begin with, I can only speculate that the leaves acted as some sort of “sunscreen” (for lack of a better term) on my drying paper. Like the coffee that I used in my papermaking process, the colour of my paper developed with time and the heat of the sun. These covered spots appear as if they were bleached — especially in comparison to the deep, dark brown of the paper (this sheet actually came out the darkest out of all of my attempts!).
PRINT/PAINT IT!
Feather Quill & Fountain Pen Trials:
I wanted to see how my feather quill and my fountain pen reacted to my homemade paper. I compared these trials to a sheet of acid-free white sketchbook paper. Below, you’ll see a photo of these two trials! On both, I wrote out the upper text with my feather quill and the lower text with my fountain pen.

As you can see, my writing was certainly shakier and less consistent on the homemade paper. The surface was certainly rougher than the uniform sheets of sketchbook paper. Additionally, my homemade paper was thicker than the other sheet and therefore, it was more difficult to work with. However, the antique allure of the homemade paper is still so worth it!
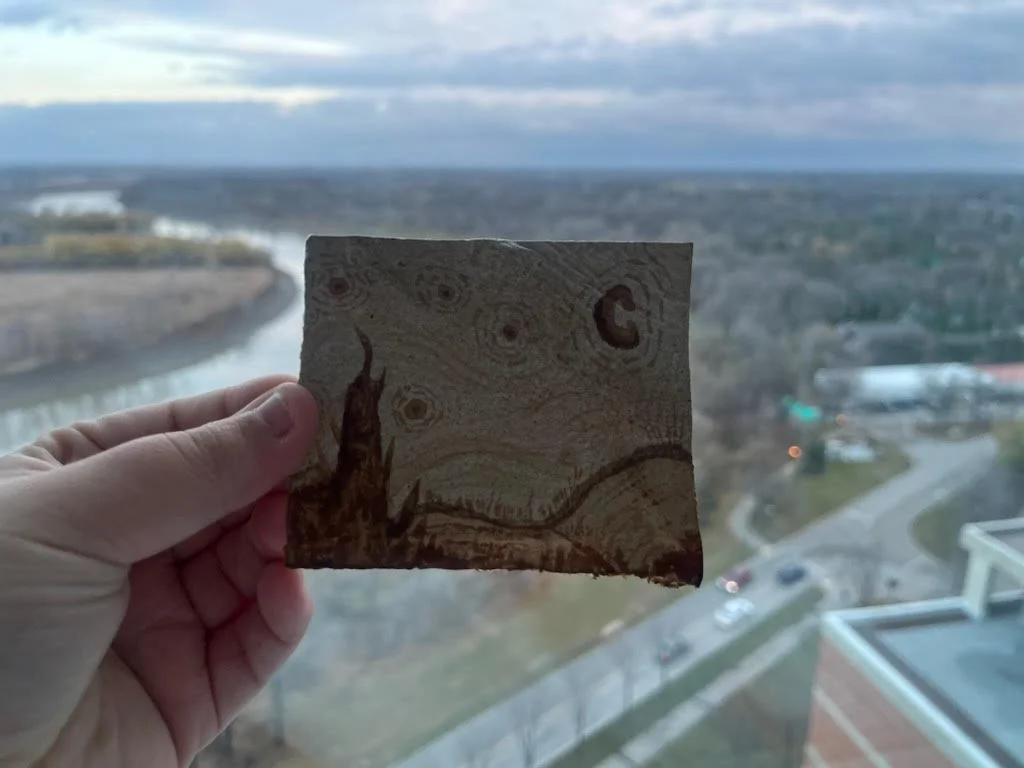
Coffee-ception! Painting with Instant Coffee:
I wanted to entertain some coffee-ception! By painting with instant coffee — darkening it into various shades — I was able to experiment around with recreating some painting concepts. I tried out two pieces: one was inspired by Bob Ross’s style of landscapes (I mindfully painted the moon near the thinnest part of the paper — thus, creating the glowing effect) and the other was inspired by Vincent Van Gogh’s famous piece, Starry Night!


If you decide to try out this tutorial for yourself, show us your results by emailing us at humniskk@myumanitoba.ca!
Sources & Citations:
“Make a Mould and Deckle for Handmade Paper - Cheap, Quick & Dirty.” Paperslurry, Aug. 2014, paperslurry.com/blog/2014/08/01/make-mould.
“Here's How to Make Handmade Paper from Recycled Materials.” Paperslurry, 19 May 2014, paperslurry.com/blog/2014/05/19/how-to-make-handmade-paper-from-recycled-materials.
“What Lies Beneath: The Reliability of Watermarks as a Method for Telling Time.” Medieval Studies Research Blog: Meet us at the Crossroads of Everything, University of Notre Dame's Medieval Institute, https://sites.nd.edu/manuscript-studies/tag/watermarks/. 10 Feb. 2017.
Note: Please disregard the set text below this note. This is the website default as I - with permission -created this webpage for the digital media project on the Crafting Communities website builder due to Squarespace’s limited trial period available! - IH